May 2014 update: I’ve ditched the below method of database backup… I’m now using Comcure.
June 22nd 2010 update: I’m still using this software to run my MySQL database backups on a schedule but I have to say I’m not totally recommending the below method because of a couple ongoing problems.
Issue # 1: My ip address frequently changes on my adsl account… when it does my backups will not work. I need to make an update to my web host control panel.
Issue #2: This software doesn’t have a “pause backup” button that allows you to pause a db download currently being downloaded.
Conclusion: If I had to do this again I might try to setup some sort of cron job that emails me the db’s zipped to a gmail account. The solution below does have the benefit of being the only solution that allows you to “restore” you db simply. Just right click and select restore.
Conclusion for WordPress users: There is a great and free plugin for WordPress called Ben Fei… it backs up your db and other customized wordpress files on a schedule.
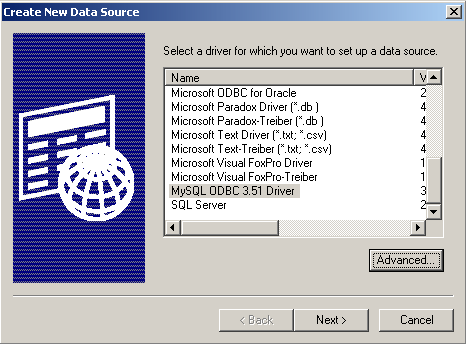
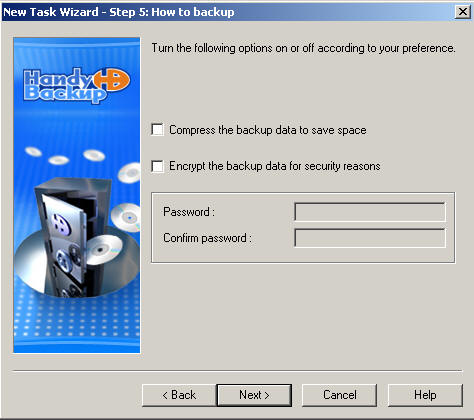
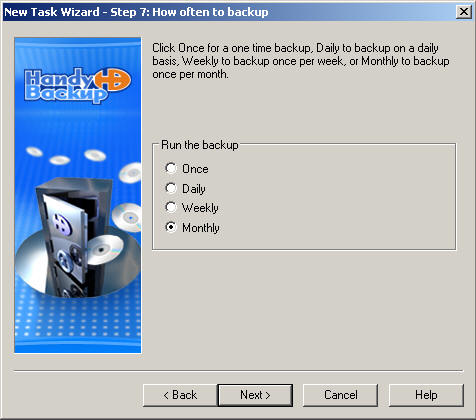
Here are some screen shots of me setting up Handy Backup 6.1 ( not free ) to automatically download the MySQL databases I have on my shared web hosting company ( dreamhost ) on schedule. Getting this all setup took me a couple hours because I didn’t have the right MySQL connector driver installed on my Windows XP machine. Once it was installed everything went smoothly. If you don’t have the “MySQL ODBC 3.51″option available in the create new data source window wizard then you can download it here. If you need to download/backup an MSSQL database automatically on schedule please see this post.
My databases ( mostly wordpress databases ) are hosted on Dreamhost… in order to get this to work with Dreamhost you must do the following:
You need to login to your Dreamhost control panel and add your IP address range to the allowable hosts… to do so, go here:
https://panel.dreamhost.com/index.cgi?tree=goodies.mysql&
==================== example of what you need to add ====================
197.156.37.%
197.156.37.243
You should now be able to connect without a problem to back up/restore databases.
You can download the 30 day trial of handybackup or buy it here. http://www.handybackup.net/ . I purchased the Standard Edition for $39 and then purchased a $29 add-on that enables you to backup databases. Without the database add-on I was using the software just to backup all the websites I have had various web hosting companies. Many web hosting companies do not keep reliable backups. You also never know if they are going to go out of business or have their building burn down.
I wanted one program that would take care of everything… backing up my websites… backing up my databases… the ability to schedule automated backups… and ability to “restore” what I have backed up back to the web host quickly to prevent downtime.
Let’s get started:
make sure you have the MySQL ODBC 3.51 driver installed on your machine.
Install handybackup and the database plug-in.
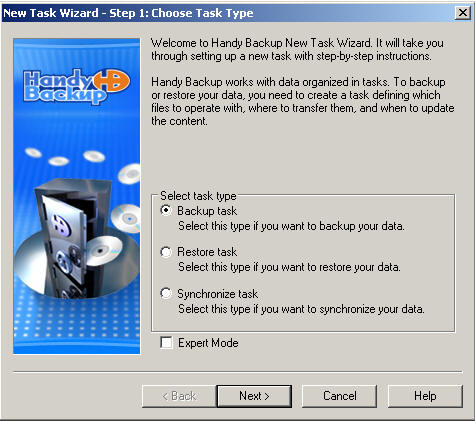
Open up handybackup and click file: new task.
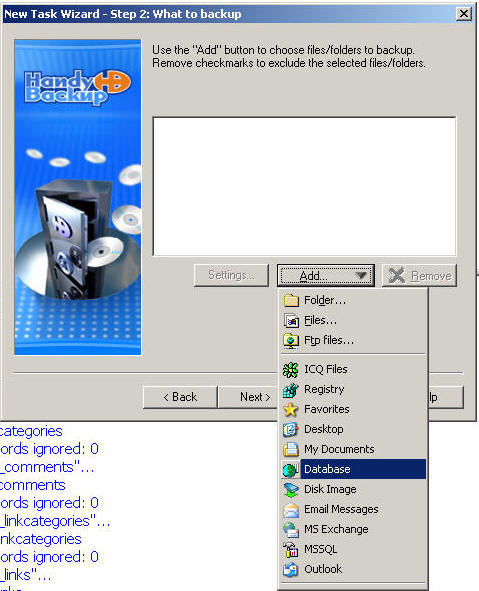
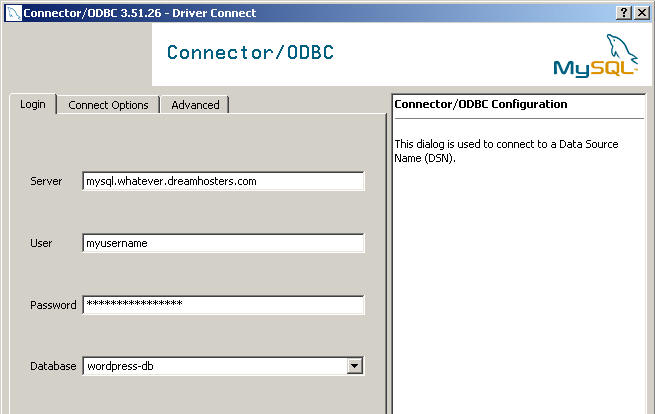
. You will need to set up a data source for each different web host and you will need your MySQL hostname where your databases are stored. You will also need your usernames and passwords as well as the database names.
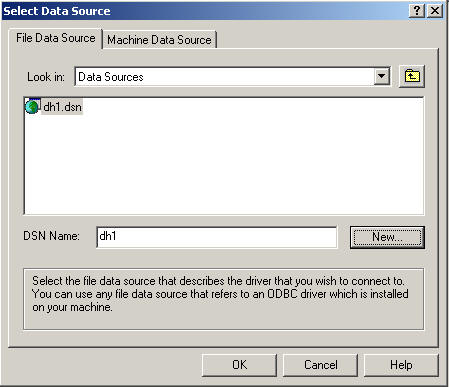
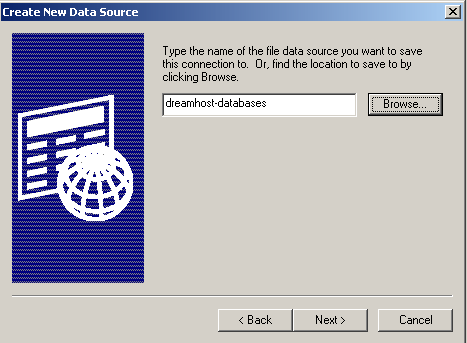
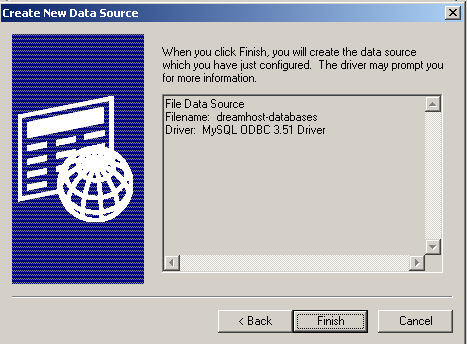
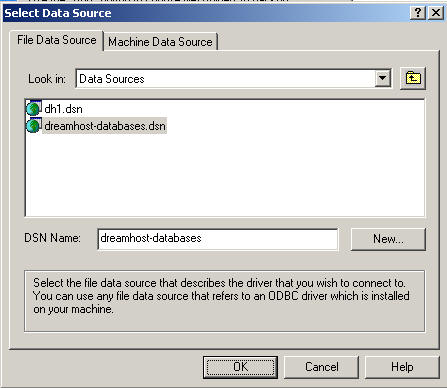
. At this point you have successfully defined in the data source. Again this only needs to be done one time for each web host. Not for each individual database. You will now need to select your new data source and continue with the wizard.
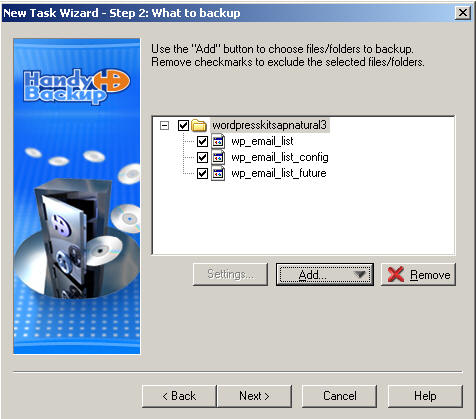
. You can see the database represented as the folder in the tables underneath it in the above screenshot. Now I’m going to add another database on the same web host to this backup task.
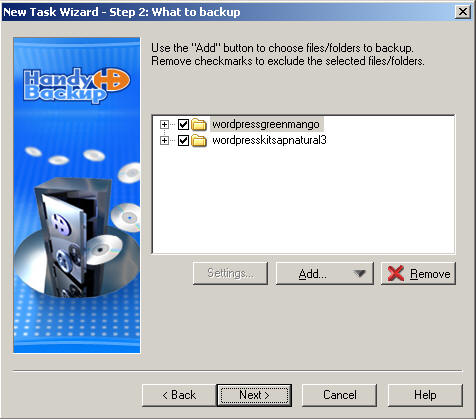
. Now you can see I have two databases set up.


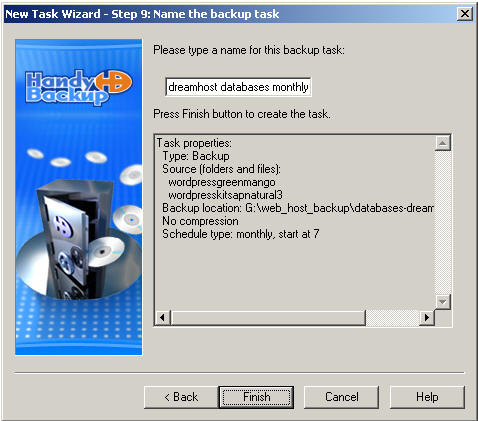
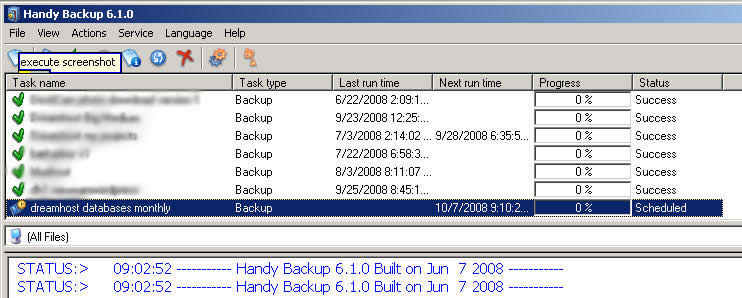
. You’re back up task has been successfully created. Just execute the task to initiate the download. Or wait for the schedule to start it automatically.
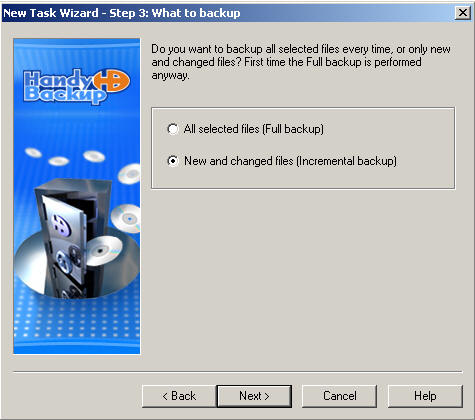
One drawback to having multiple databases under one task is that when you go to restore a database it does not currently let you choose which individual databases to restore. It just restores all of them. So I recommend you set up one task with one database and then duplicate that task for the other databases. You can then restore individual databases at your leisure.
Another drawback I found is that you can back up with timestamps however when you go to restore a database you are not given the choice of which version to restore. It seems to automatically restore the most recent copy.. You could probably get around this by temporarily removing the timestamp versions you don’t want restored.
Another drawback is that this software is not capable of backing up the stored procedures. Fortunately I don’t have any of those on any of my databases.
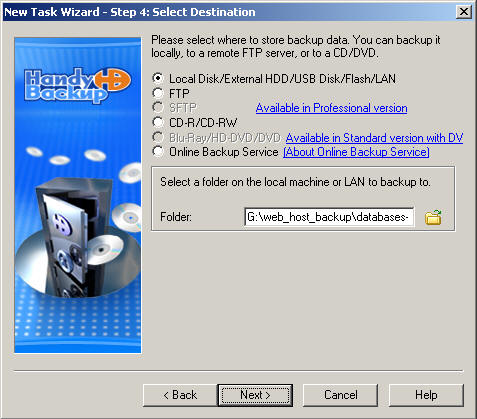
Handybackup also supports automatic uploading of backup data from your local computer to a remote location such as your web host. I was already using another open-source software package to handle that so I am not yet using handybackup for that. See my previous post for more info.
Handybackup also supports the backing up of your physical hard drives for disaster recovery… I was already using another software package to handle that so I have not checked into that. I use Acronis True Image… see my previous post on that subject.
If you need to download/backup an MSSQL database automatically on schedule please see this post.
Tags: MySQL database backup,Virtual Web hosting databaseBackup, Create DSN ODBC Connection, Windows XP, Automatic, easily restore MySQL databases, Bevis and Butthead, backing up mysql database on dreamhost, backing up your wordpress database on dreamhost, joomla database backup, drupal database backup, dreamhost,
Related articles by Zemanta
- Offsite Backup Solution MySQL Backup Tool (ghacks.net)
- Auto Backup for MySQL Database (techie-buzz.com)
- Backup, Recover and Synchronize Data with Handy Backup (teabreak.pk)
- Secure WordPress Backup Using iDrive (howtospoter.com)